Configuring the Intune Connector
Purpose
Guide customers through the process of configuring the Entra ID App Registration and the settings in the Lenovo Patch plugin.
Process
Configuring Entra ID
- Login to Entra ID.
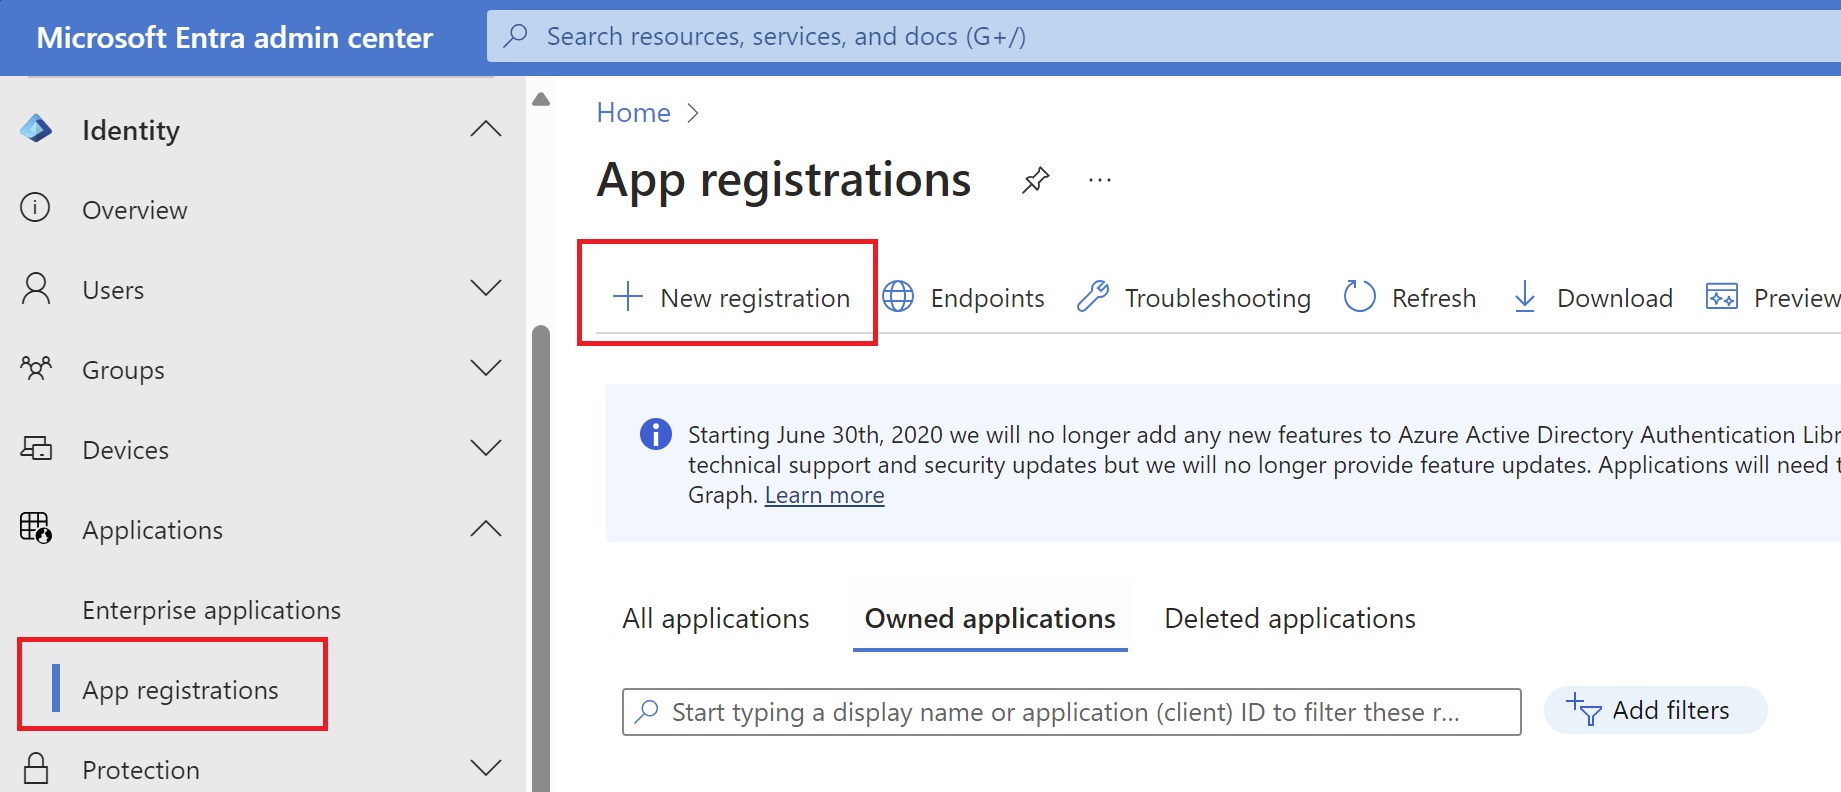
- Navigate to the Applications > App Registrations node.
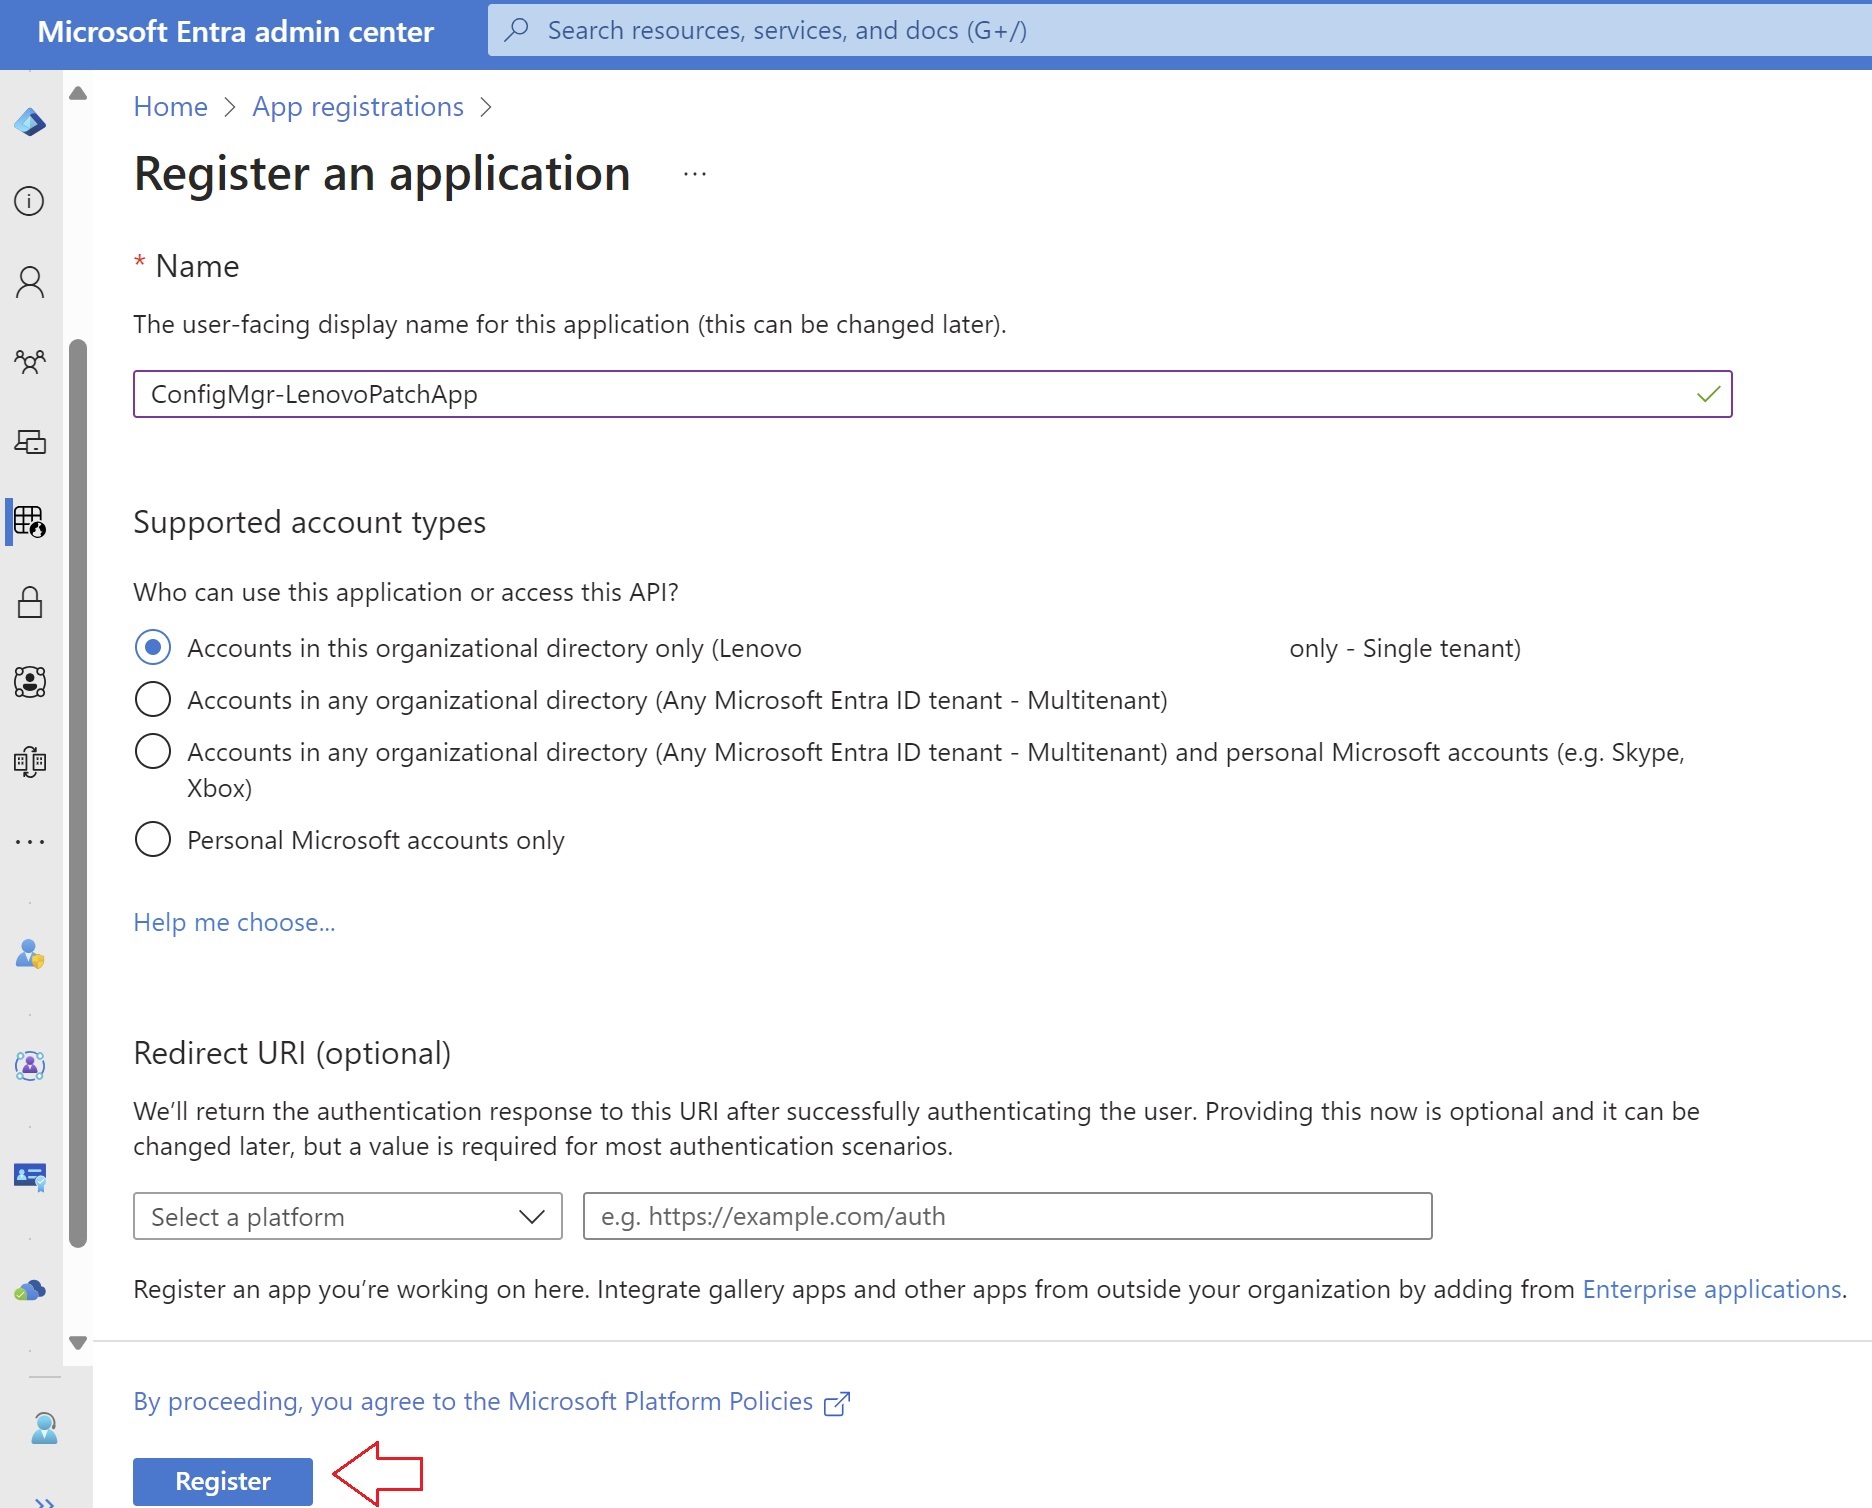
- Click on the '+ New Registration' link.
- On the 'Register an application' screen, provide a name
- For the remaining options, make selections relevant to the organization.
- Click the 'Register' button to create the App Registration.
- From the list of App Registrations, select the App Registration that was just created.
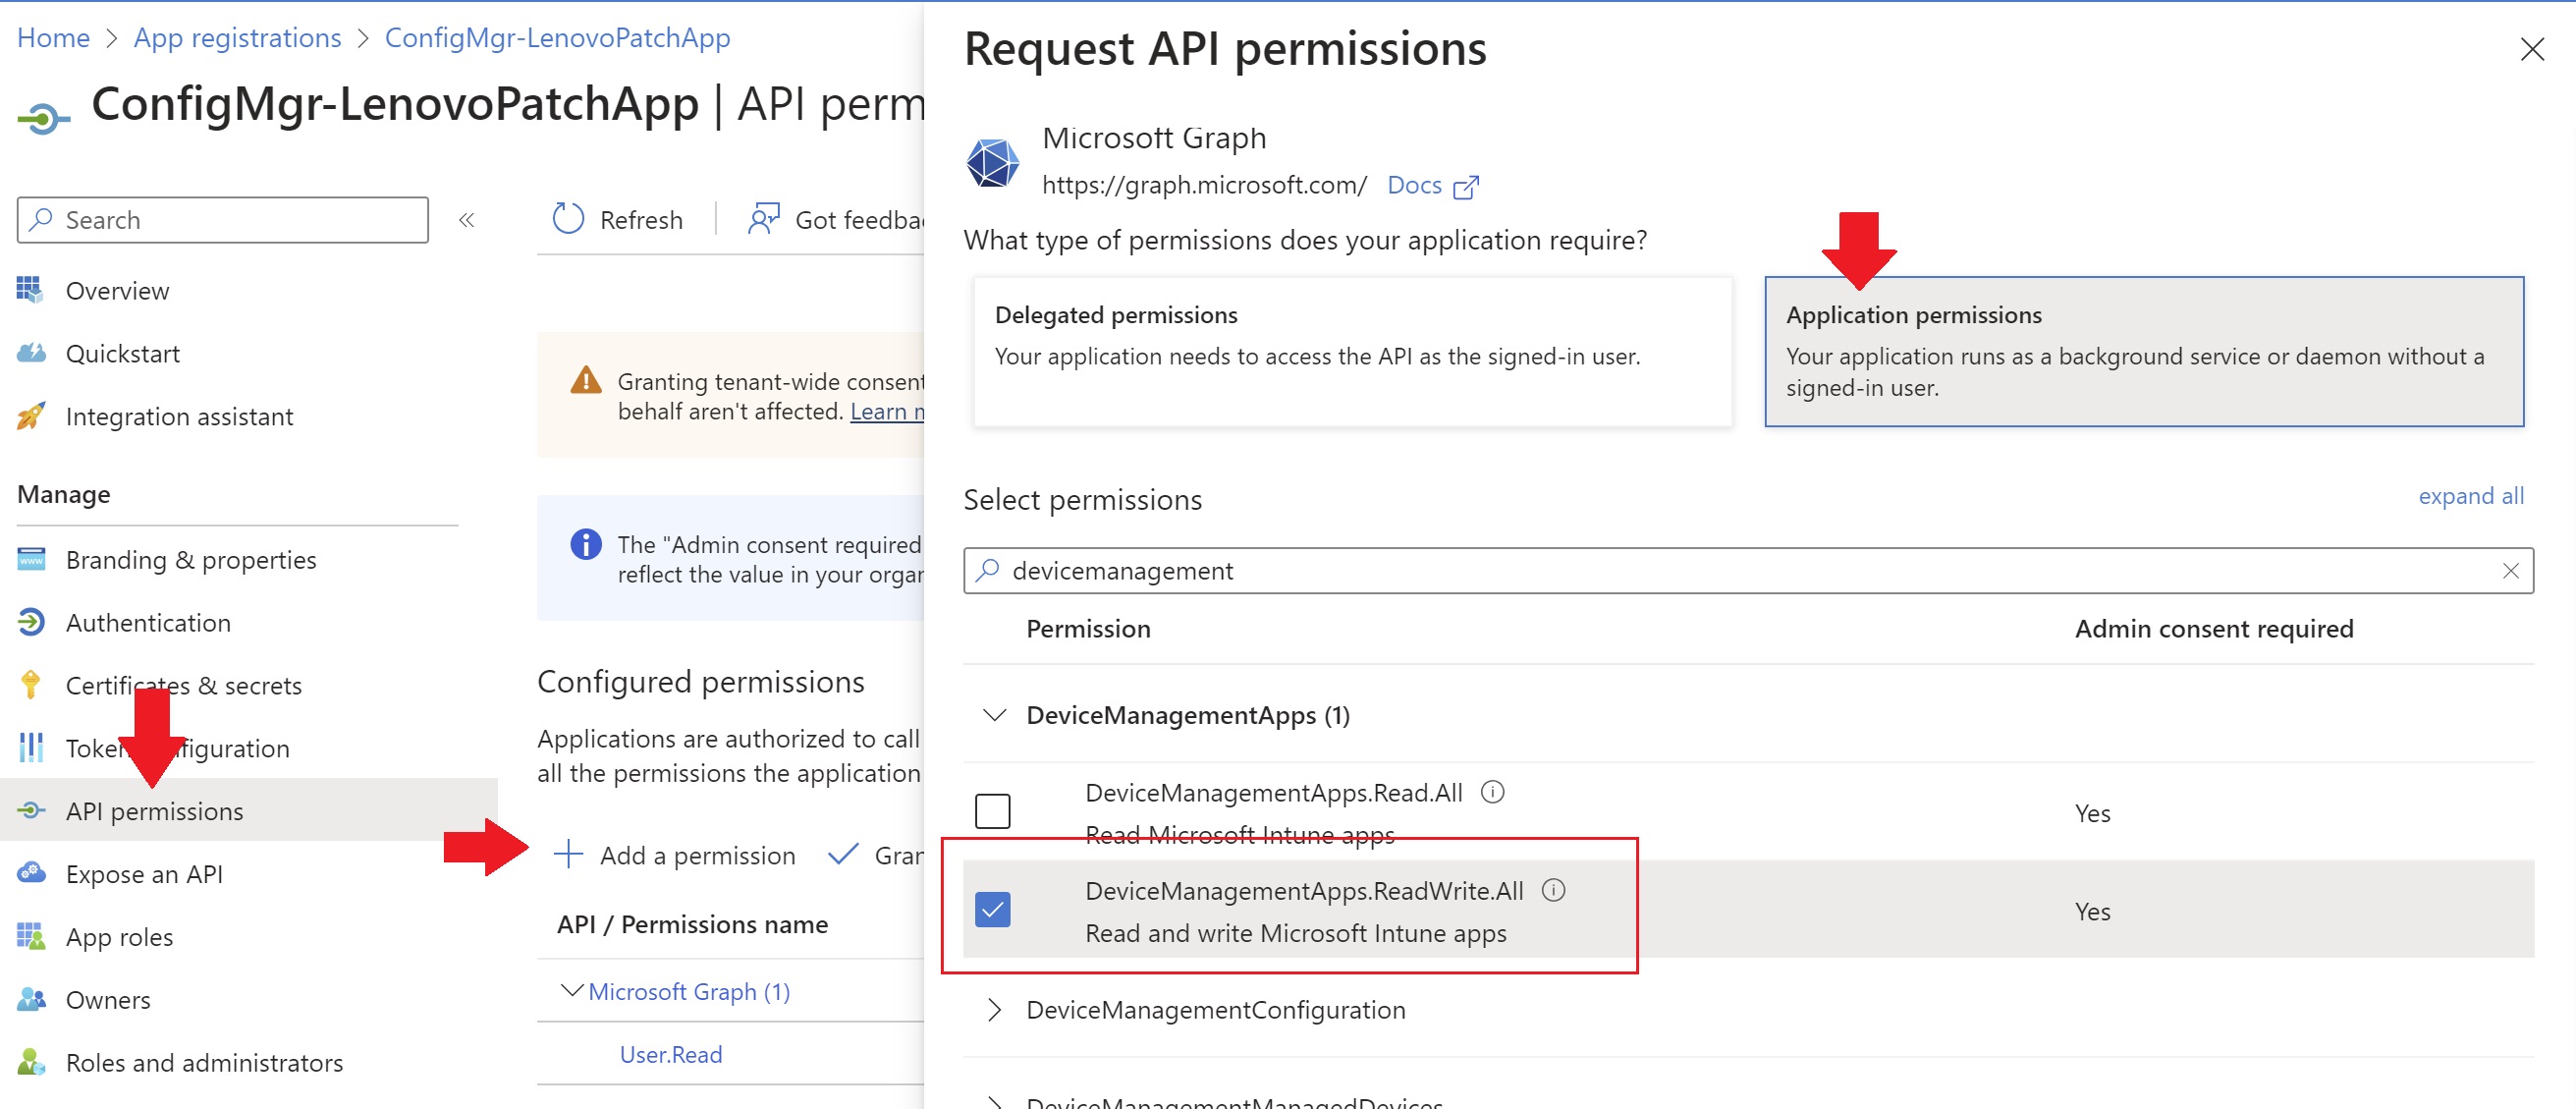
- Navigate to 'API Permissions' and click the '+ Add a permission' link.
- Select Microsoft Graph.
- On the 'Request API permissions' screen, click Delegated permissions.
- From the 'Select permissions' section, place a check mark by:
- Directory.Read.All
- Directory.ReadWrite.All
- Click the 'Add Permissions' button.
- On the 'Request API permissions' screen, click Application permissions.
- From the 'Select permissions' section, place a check mark by:
- Application.Read.All
- Application.ReadWrite.All
- DeviceManagementApps.ReadWrite.All
- Directory.Read.All
- Directory.ReadWrite.All
- GroupMember.Read.All
- GroupMember.ReadWrite.All
- Click the 'Add Permissions' button.
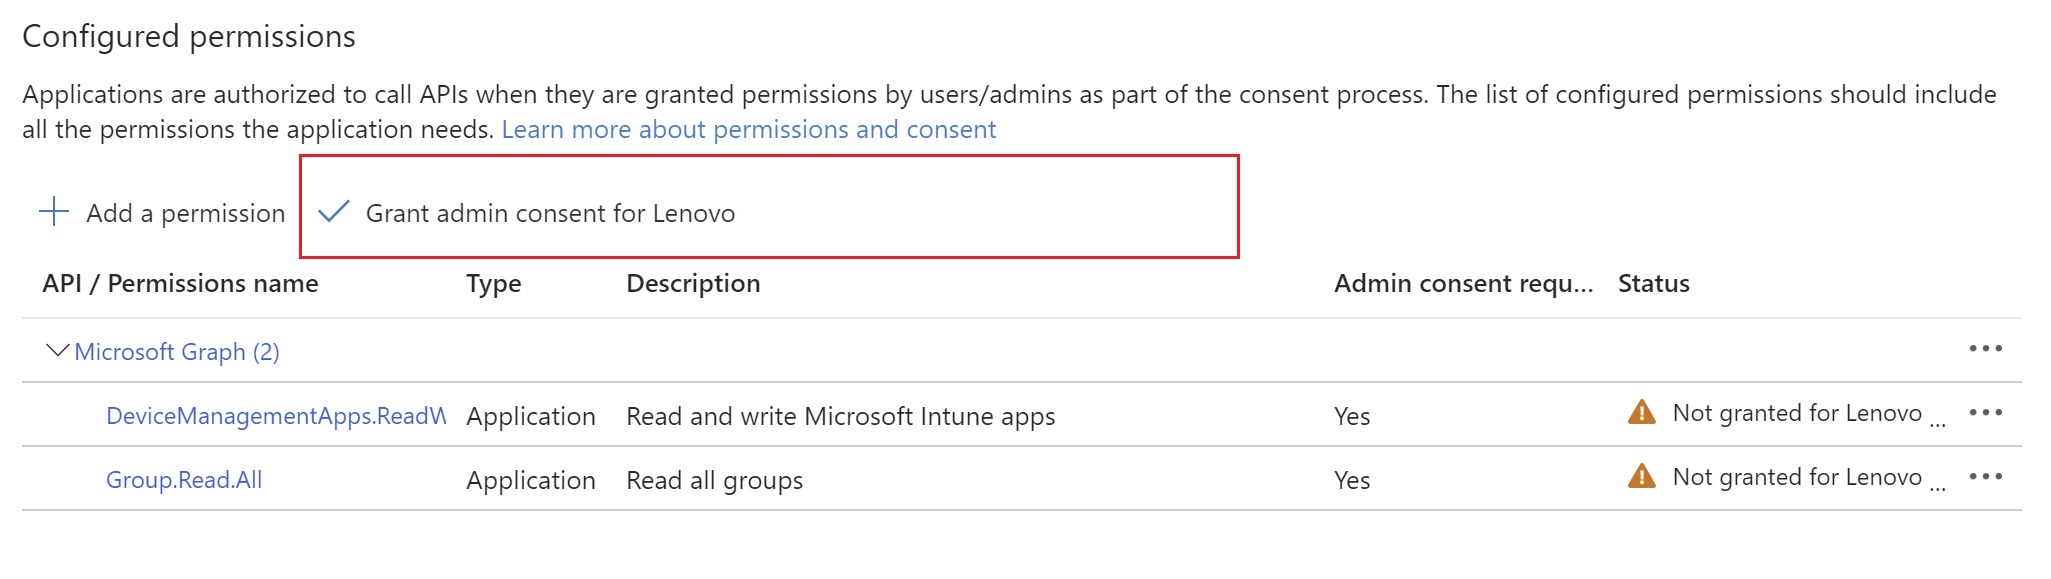
- After granting the permissions, an Entra ID administrator will need to click the 'Grant admin consent for …' button on the 'Configured permissions' screen.
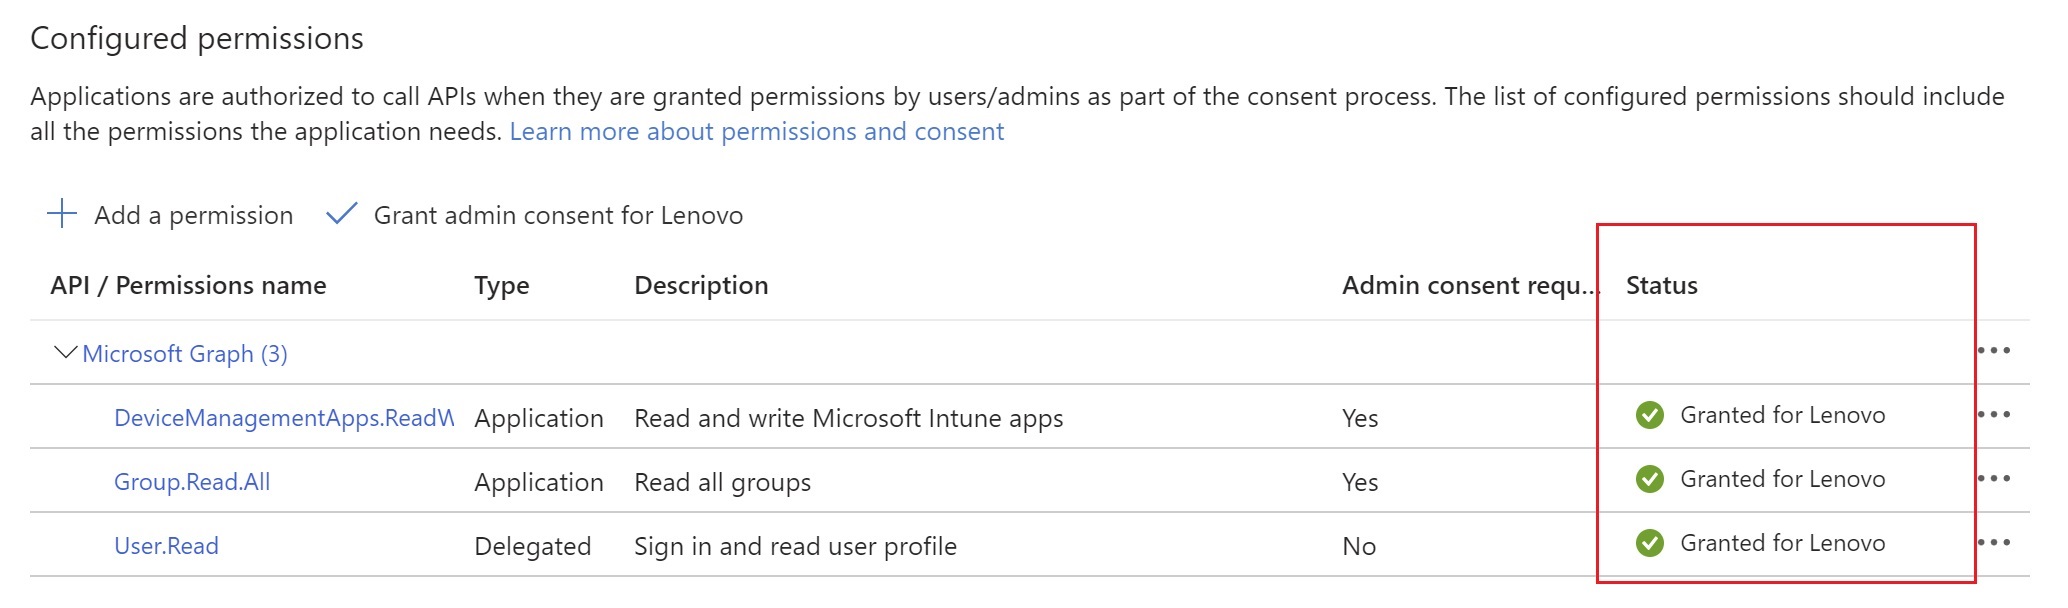
- Once the Entra ID administrator has granted consent, the status should reflect the changes as above.
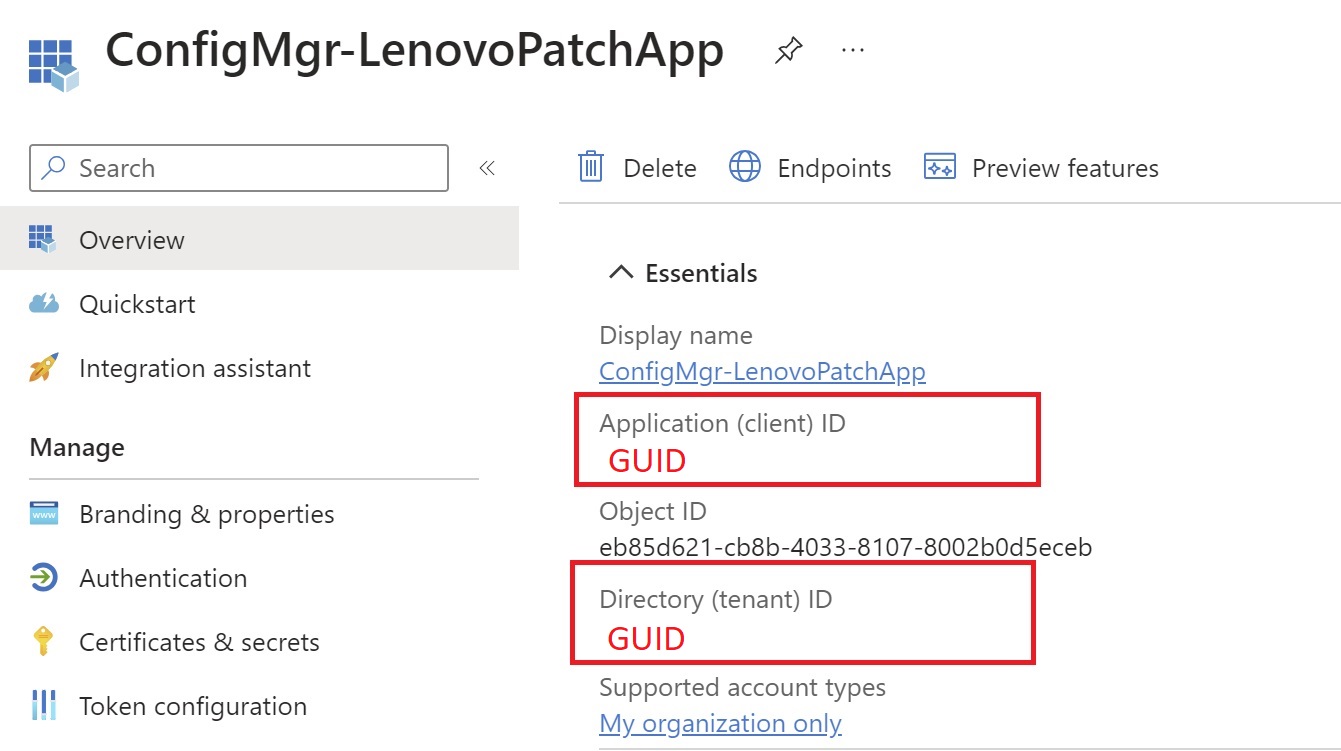
- Obtain the Application ID GUID, Directory (tenant) ID GUID, and the secret information to use in the next section to configure the Lenovo Patch settings.
Configuring Lenovo Patch Settings
- In the Configuration Manager console, navigate to Software Library > Overview > Software Updates > Lenovo Patch > Updates.
- In the ribbon bar, click on 'Settings'.
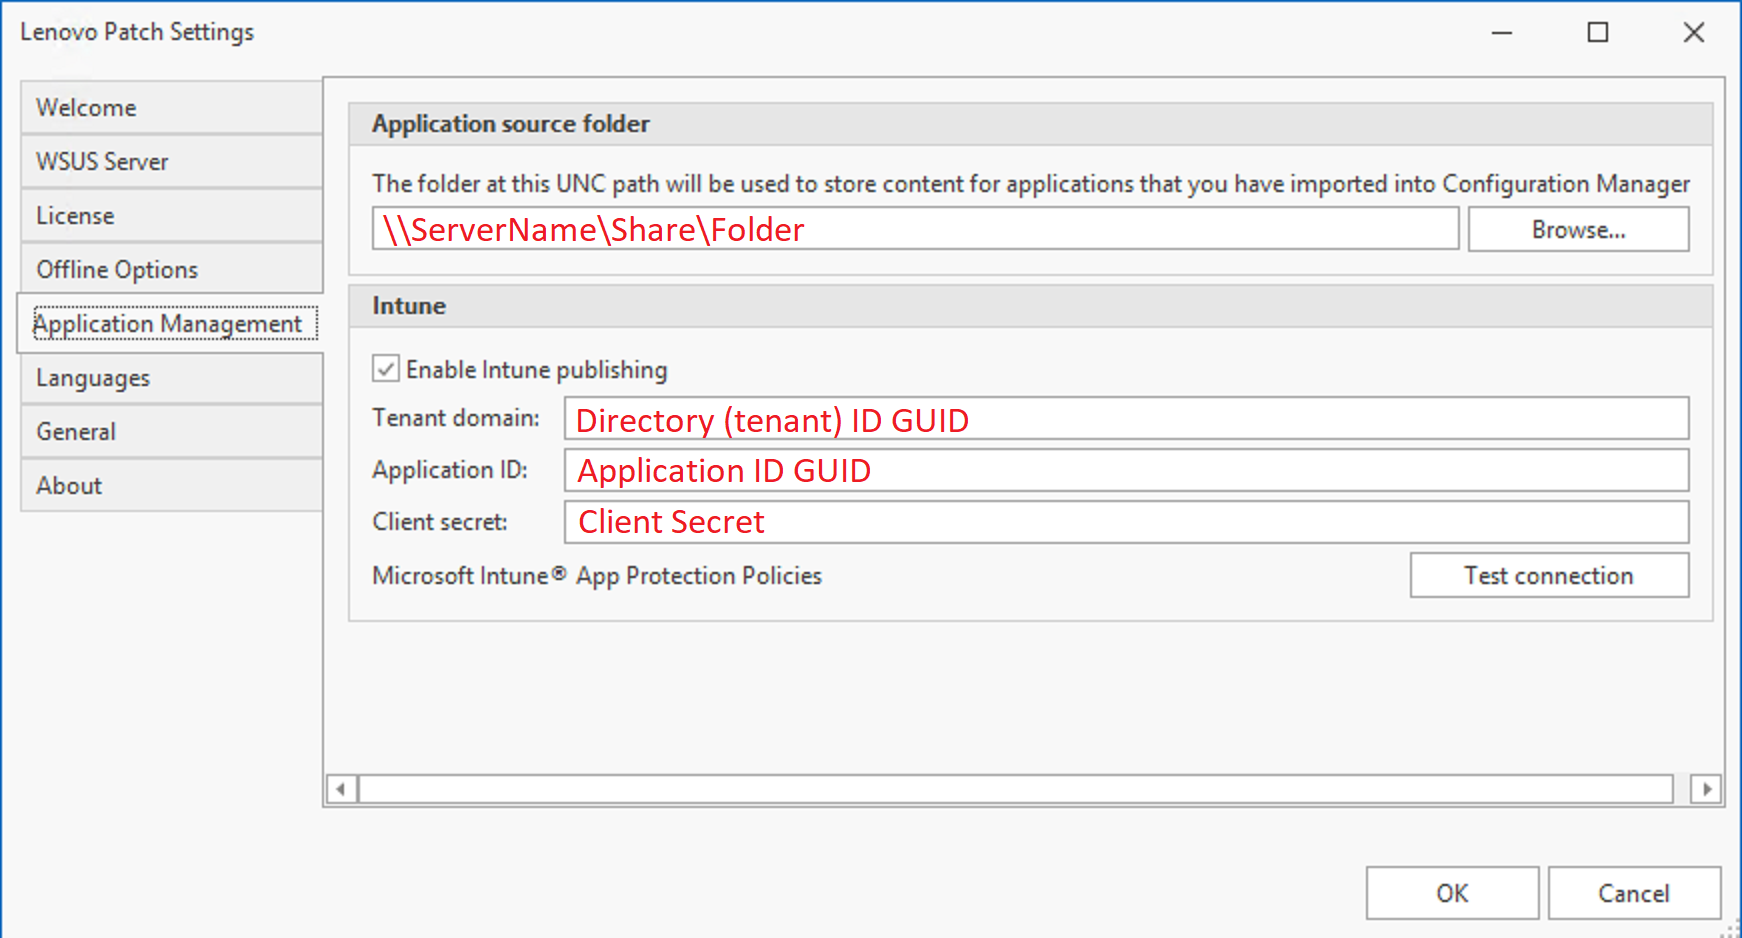
- Click on the 'Application Management' tab.
- Configure the 'Application source folder' using a UNC path to a folder to contain the source media for the application installers.
- Enable the checkbox by 'Enable Intune publishing'.
- In the 'Tenant domain' text box, enter the GUID from the Directory (tenant) ID from step 14 above.
- In the 'Application ID' text box, enter the GUID from the Application ID from step 14 above.
- In the 'Client secret' text box, enter the secret from step 14 above.
- Click the 'Test connection' button to test the connection to Intune.
- Upon success, click the 'OK' button to save the settings.