Running the Intel® Auto Verify Tool (GUI version)
The ThinkShield BuildAssure Intel® Auto Verify Tool is a standalone graphical user interface compatible with Windows® 10 and Windows® 11 operating systems. It provides two main functions:
• Platform Certificate Validation: Verifies the Platform Certificate issued to the platform.
• Direct Platform Data File Validation: Confirms the integrity of the Direct Platform Data file generated during the manufacturing process.
Downloading the Intel® Auto Verify Tool
- Log in to the Intel Trust Authority portal at https://portal.trustauthority.intel.com
- In the Service Catalog, select Transparent Supply Chain.
- Navigate to the Download Center.
- lick the Download button under the Auto Verify Tool section.
- The downloaded zip file contains the following:
- AutoVerifyTool.exe
- Auto Verify Tool End User Guide
- Extract the AutoVerifyTool.exe file to the /user/Documents folder.
- Double-click the AutoVerifyToolLenovo.exe file.
- The Auto Verify Tool will launch, displaying the Graphical User Interface.
Intel® Auto Verify Tool User Interface
The Auto Verify Tool for GUI version has a graphical user interface and comprises 8 sections as shown below:
Function Status Information
The Function Status Information section provides operational details from the Auto Verify Tool. The Status
Information section includes the following:
- Function Status: located on the left, this section indicates the state of the scan. It becomes visible when a Function button is clicked and shows the results of the selected function.
- Snapshot Date: located in the middle. Displays the date and time of the current scan when the ScanSystem button is clicked or the date and time of the snapshot file that was read in by the ReadFile function.
- File Information/Status: shown on the right. Displays the status of the file functions:
- ReadFile: shows the status of the Direct Platform Data file read operation.
- PlatformCert: shows the status of the Platform Certificate file read operation.
- WriteFile: displays the results of the Direct Platform Data file write operation.
Platform Information Section
This section is located on the left-hand side below the Lenovo logo. It provides information of key system values such as the System Serial Number and SKU Number along with the Processor type and Speed.
Component Information Section
This section displays a subset of the component values on system components: system BIOS, motherboard, system, chassis, processor, memory, batteries, power supplies and password status.
The values displayed come from two different sources:
- The current snapshot of the system component values, when the ScanSystem button is clicked.
- The component values from the Direct Platform Data file read by the ReadFile function.
TPM & PCR Information Section
This section contains information about the Trusted Platform Module that is mounted on the motherboard. At the top of the TPM section, the TPM version is displayed. Below the TPM Information section are the PCR Registers, and at the bottom is the TPM Endorsement Key Serial Number (EKSN).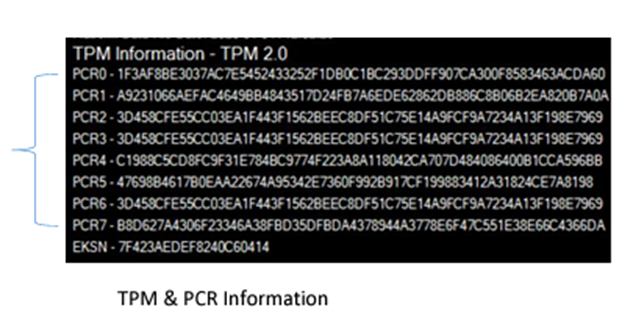
The EKSN (Endorsement Key Serial Number) is a unique serial number used to cryptographically bind the system to the TPM. During the manufacturing process of the TPM and PCR Information, the system and motherboard serial numbers are cryptographically bound to the TPM on the motherboard. Any changes to the system or motherboard serial numbers will be flagged during the PlatformCert function.

• TPM (Trusted Platform Module): A hardware-based module designed to provide security-related functions.
• PCR (Platform Configuration Register): A memory location in the TPM with unique properties.
Snapshot Comparison Section
This section displays any changes in component information between the current system scan and the As Built Direct Platform Data file read by the ReadFile function. Any changes in component information are highlighted in red.
Function Buttons Section
The Function Buttons serve as the user interface for the Auto Verify tool operations. The tool includes seven function buttons: Scan System, Read File, Compare, Compare Next, Read Platform Certificate, and Read CA Certificate.
Using the Auto Verify Tool
Certificates
The Platform Certificate file, the Direct Platform Data file, the Delta Certificate Data and the Intermediate Certificate Authority file downloaded from the Build Assure Web Portal are signed using a PKI signing process. To validate the signature of these files, an Intermediate Certificate Authority file must be downloaded as explained below..
- Platform Certificate: Provides platform attestation with the TPM modules and the Hardware Root of Trust.
- Direct Platform Data: Used to verify that the platform BIOS, hardware, and firmware configurations have not changed.
- Delta Certificate Data: Used to verify that the platform component configurations have not changed.
- Intermediate Certificate: Contains a public key that is used by the Auto Verify tool to verify the signature of the other two certificates.
Download this Intermediate Certificate Authority file here and save it to your system.
Scan System Function
This function initiates the scanning of system components and TPM information. The scanning operation performs the following tasks:
- Read the following platform components: (BIOS, System, Motherboard, Chassis, Processor, Memory DIMMs, Batteries, AMT FW Version, Power Supplies)
- Read the Trusted Platform Module PCR Registers, Public Endorsement Key and the Endorsement Key Serial Number.
- Read the Internal Drive Information.
Note: Removable drives are not included. - Read the WMI Information for internal Keyboard, internal Pointer, internal Network devices.
Note: External devices are not included.
Click the ScanSystem button located in the upper left corner of the Auto Verify Tool UI.
The Scanning System Components Completed message will be displayed.
Issuing Certificate Authority Read File Function
The Platform Certificate file, Direct Platform Data file, and Delta Certificate Data file downloaded from the TSC Web Portal are signed using a PKI signing process. To validate their signatures, an Intermediate Certificate Authority file must be downloaded.
This Intermediate Certificate Authority file contains a public key used to verify the signatures of the Platform Certificate file and the Direct Platform Data file. Follow these steps:
- Download the Intermediate Certificate Authority file from the OEM URL. This URL is typically included in the set of files for the device or listed on the OEM's web portal.
- Save the file on the system.
The Certificate Authority Signature Read File function reads the Intermediate Certificate Authority file and extracts the public key. This public key is used to validate the signatures of the Platform Certificate file, the Direct Platform Data file, and the Statement of Conformance file.
To rad the Issuing CA Certificate file, click the Read CA Cert button, located in the lower right-hand section of the Auto Verify Tool interface.
After completing the Read CA Certificate process, the following buttons will be enabled : Read DPD File, Read Platform Cert, Read CA Cert.
Read File Function
This function will open the Direct Platform Data file associated with the platform. The Read Direct Platform Data File function opens the Direct Platform Data file associated with the platform. Once the file is read, the Direct Platform Data component values are loaded into the Auto Verify Tool and displayed in the user interface.
By default, the tool uses the directory where the Auto Verify Tool was executed.
- Select Read DPD File button.
- Select the Direct Platform Data .XML file you downloaded from the portal.
After the completion of reading the Direct Platform Data file, a message indicating Direct Platform Data file read completed will be displayed in the Function Status.
The Auto Verify Tool is now ready to perform the Compare operation. The Compare button will now be enabled.
Compare Platform Components Function
This function compares the current system component values captured by the ScanSystem operation with the component value information read from the Direct Platform Data file.
Click the Compare button and the Auto Verify Tool will execute the comparison operation.
Upon completion, the Function Status should display the message No Component Changes have been detected.
Compare Next Component Function
If more than one component change is detected, the Next Diff button becomes enabled once the Compare function completes. After the comparison operation is complete, the scan results will be displayed in the Scan Status information section:
You will see this message on the bottom of the screen:
Click the Next Diff button and this other message will be displayed:
Platform Certificate Verify Function
This function verifies if the TPM Endorsement Key serial number collected at the time of manufacturing matches with the Endorsement Key serial number in the Platform Certificate.
- Click the PlatformCert button located in the lower right-hand section of the Auto Verify Tool UI.
- Select the Platform Certificate file (.cer) that is associated with the platform serial number.
- Click the Open button.
Upon completion, the TPM PCR Register section of the UI should display the Platform Certificate Matches message along with the Certificate Values.
Platform Certificate value changes are highlighted in red.
Delta File Generation
The Delta file generation function becomes available after loading the Platform Certificate. The tool will generate a Delta XML file if there have been any additions, removals, or modifications of components on the platform. If no changes have been made since the creation of the Platform Certificate, the tool will not generate a Delta XML file.
To generate the Delta file:
- Click the Write Delta File button. This will open a file explorer.
- Select a Delta certificate (or multiple Delta certificates).
- After selecting the files, click Open. If a change has been detected, the tool will generate a Delta XML file.
If no previous Delta Certificates have been generated, do not select any files and click Cancel.
Example #1 - (No Delta certs files selected, then click Cancel)
After clicking Cancel, you will see a message similar to the following, indicating the location of the Delta XML file that was generated:
After clicking Open, you will see a message similar to the following, indicating the location of the Delta XML file that was generated:
Example #3 – No previous delta, click on Cancel > no changes on the platform, thus no Delta xml is generated.
Related Articles
Using Intel® Verify Utility Commands (CLI version)
The BuildAssure Verify Utility is a command-line executable that runs in a user-initiated command prompt window. It supports the following commands: SCANSYSTEM: Scans the platform to retrieve current platform values and outputs them to the console. ...Running On-demand Measurements
This feature introduces the ability to perform on-demand measurements on the device, run the measurement (verify firmware integrity) of each component, and display the latest logs on the Cloud UI. It also enables a two-step attestation of ...Installing a Sepio Agent
This article explains how to install and uninstall a Sepio Agent on a Host. The Sepio Agent is a security tool that provides in-depth visibility and enforces policies on assets built into and connected to the Host. The Platform Management system ...Downloading and Installing Ivanti
To use Ivanti Neurons for IT operations, you must first deploy the Ivanti Agent on your endpoints. The agent enables communication with the Neurons Cloud and enforces policies defined by administrators. This article describes how to download, ...Installing the Agent
Types of Agent Releases: GA (General Availability): This is the fully tested and released Agent version recommended for production environments. EA (Early Availability): This Agent version may include new features that are still being validated. EA ...